Celebrating with American Flag Rice Krispie Treats: A Sweet, Nostalgic Treat
Hey friends! Are you ready to dive into a colorful, fun, and delicious recipe that’s perfect for celebrations? Today, I’m sharing my take on American Flag Rice Krispie Treats! These treats are not only incredibly easy to make, but they’re also bursting with nostalgia and perfect for gatherings like Memorial Day, Independence Day, or any fun summer BBQ.
You know, there’s something magical about Rice Krispie Treats. They take me back to my childhood—playing outside with friends, the smell of summer in the air, and the sweet, gooey goodness of marshmallows and butter coming together to create the most delightful snack. I remember making these treats for the first time with my mom. It was a rainy day, and we got all the ingredients out, but instead of following the recipe perfectly, we added in mini chocolate chips and some random sprinkles that had been lurking in our pantry. It was a messy, fabulous success! From that day on, I knew the kitchen was a place of creativity and fun. And now, I want to share that joy with you by taking it up a notch with a festive twist!
Get ready to impress your friends and family with these American Flag Rice Krispie Treats. Not only are they delicious, but they’re also a fantastic way to show off your festive spirit. So grab your cutting board, put on some good tunes, and let’s make some magic happen!
Ingredients
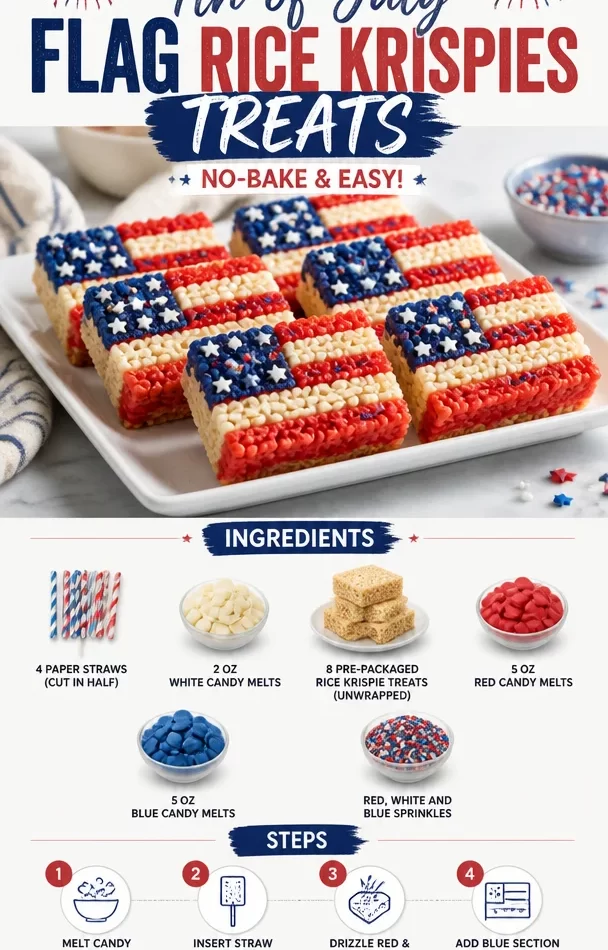
Here’s what you’ll need to whip up these festive treats:
-
4 paper straws (cut in half): These will serve as the “stick” for your pops. You can substitute them with lollipop sticks or even colorful wooden skewers if you like!
-
2 oz white candy melts: This is the base for your pops. If you can’t find white candy melts, you can use white chocolate chips, just remember they will need extra care to melt smoothly.
-
8 pre-packaged Rice Krispie Treats (unwrapped): The beauty of using pre-packaged treats is that they save you time and hassle! If you want to make your own, feel free! Just use equal parts Rice Krispies, marshmallows, and butter.
-
5 oz red candy melts: A must for that vibrant red color! If red candy melts aren’t available, you can use regular chocolate or even a red food coloring to tint white chocolate.
-
5 oz blue candy melts: Same as above, blue candy melts give that perfect flag feel! If you prefer, feel free to get creative with other colors—it’s all about your vibe!
-
Red, white, and blue sprinkles: These will add a fun finishing touch! You can use any patriotic sprinkles you can find—just make sure they’re festive!
Now that we have the ingredients prepped and ready, let’s dive into how to bring these to life!
Step-by-Step Instructions
-
Prep Your Workspace: Before getting started, make sure your kitchen counter’s cleaned up and you have all your ingredients within reach. This makes the process feel more enjoyable and less chaotic!
-
Melting the Candy: Begin by setting up a microwave-safe bowl for each color of candy melts: red, white, and blue. Microwave them one at a time in 30-second intervals, stirring in between until they are melted and smooth. This part is so fun—watching them transform!
-
Assemble the Base: Take your unwrapped Rice Krispie Treats and gently mold them into rectangular shapes if they aren’t already. You want them a bit longer and flatter for easy dipping. They should stand tall but still be nice and firm.
-
Dip the Treats: It’s time for the fun part—dipping! Take your prepared treats and dip the bottom half in the white candy melts. Lift them out of the bowl and let the excess chocolate drip off. Don’t worry about it being perfect; the rustic look adds to the charm!
-
Add the Red and Blue: Once the white candy melts have set a bit, use a spoon to drizzle red candy melts over the top of the treat, creating stripes. Next, add some blue candy melts on one end of the treat and create a rectangle for that signature flag look. Go ahead and have fun with it!
-
Sprinkle Time: While the candy is still melty, grab those red, white, and blue sprinkles and gently sprinkle them over your creations. This is where things get really festive!
-
Attach the Straws: Once those treats are fully decorated, take the cut paper straws and gently stick them into the bottom of each Rice Krispie Treat. This makes them easy to eat and fun to display!
-
Set to Dry: Place your finished Rice Krispie Treats on a parchment-lined baking sheet and let them cool completely. They’re done when the candy coating is fully set!
-
Serve & Enjoy: Once cooled, arrange on a platter, and voila! You’ve got a beautiful patriotic platter of sweet treats that will have everyone raving.
Serving Suggestions
Plating is key to making your American Flag Rice Krispie Treats shine! Arrange them on a festive platter, alternating the positioning of the treats to showcase both the red, white, and blue colors. You could also add in some small flags as decoration, or set them among some fresh strawberries and blueberries for a fresh touch. It’s all about making it look fun and inviting!
Recipe Variations
Feel like getting creative? Here are some fun variations you can try:
-
Chocolate-Dipped Treats: Use dark or milk chocolate instead of colored candy melts for a rich twist.
-
Flavored Marshmallows: Try using flavored marshmallows to add an unexpected pop of flavor—think strawberry or blueberry!
-
Nutty Crunch: Mix in some chopped nuts to the Rice Krispie mixture for added texture.
-
Seasonal Sprinkles: Change up your sprinkles for other holidays—think spooky decorations for Halloween or pastel colors for Easter!
-
Layered Colors: Instead of stripes, layer colors in the treat itself for a colorful bite!
Chef’s Notes
These American Flag Rice Krispie Treats have become more than a simple dessert for me; they represent memories, creativity, and fun! I’ve enjoyed making these with friends and family during holidays, and they always bring a smile to everyone’s face. I can’t tell you how many times I’ve made them last-minute and added whatever I had in my pantry, and they always turn out fabulously!
One memorable time, I made these treats for a neighborhood gathering, and while assembling, I accidentally knocked an entire bowl of sprinkles all over the floor. Instead of being upset, laughter erupted as we jumped into the fun, sprinkling the floor and making it a little festive mess. Because let’s be real: cooking is all about the experience!
FAQs and Troubleshooting
Can I use regular marshmallows instead of pre-packaged treats?
Absolutely! If you’re looking to make these from scratch, melt 4 cups of mini marshmallows with 3 tablespoons of butter, then mix in 6 cups of Rice Krispies. Let it cool before shaping!
How do I store leftovers?
Store any leftovers in an airtight container at room temperature for up to three days. You want them fresh but not overly refrigerated, or they may become hard!
My candy melts didn’t melt properly—help?
If your candy melts get too thick while melting, try adding a teaspoon of vegetable oil or coconut oil to help smooth them out.
Why did my treats not stick?
Make sure to work quickly when dipping and decorating, as candy melts can set fast. If you find they aren’t adhering well, a quick re-dip in the melted chocolate can help.
Nutritional Info
While I like to focus more on the enjoyment of food rather than just the numbers, if you’re interested in nutrition, a serving of Rice Krispie Treats can typically equate to about 120 calories, depending on ingredients and portion sizes. Not too shabby for a delightful treat!
So there you have it, friends! These American Flag Rice Krispie Treats are a delightful way to celebrate while enjoying a taste of nostalgia. Let’s make more memories—one sweet bite at a time! Happy cooking!
PrintAmerican Flag Rice Krispie Treats
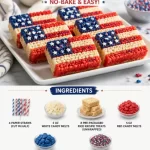
These colorful Rice Krispie Treats are perfect for celebrations like Memorial Day and Independence Day, bringing nostalgic flavors with a festive twist.
- Prep Time: 15 minutes
- Cook Time: 10 minutes
- Total Time: 25 minutes
- Yield: 8 servings 1x
- Category: Dessert
- Method: No Cook
- Cuisine: American
- Diet: Vegetarian
Ingredients
- 4 paper straws (cut in half)
- 2 oz white candy melts
- 8 pre-packaged Rice Krispie Treats (unwrapped)
- 5 oz red candy melts
- 5 oz blue candy melts
- Red, white, and blue sprinkles
Instructions
- Prep your workspace by cleaning the counter and gathering all ingredients.
- Begin by setting up a microwave-safe bowl for each color of candy melts (red, white, and blue). Microwave one at a time in 30-second intervals until melted and smooth.
- Take your unwrapped Rice Krispie Treats and mold them into rectangular shapes for easy dipping.
- Dip the bottom half of each treat into the white candy melts and let the excess drip off.
- Once the white candy melts have set a little, drizzle the red candy melts over the top to create stripes.
- Add blue candy melts on one end to form a rectangle, representing the flag.
- Sprinkle red, white, and blue sprinkles over the melty candy.
- Gently stick the cut paper straws into the bottom of each Rice Krispie Treat.
- Place the treats on a parchment-lined baking sheet to cool completely until the candy coating sets.
- Once cooled, arrange on a platter and enjoy your festive treats!
Notes
Store leftovers in an airtight container at room temperature for up to three days. Use regular marshmallows instead of pre-packaged ones by melting 4 cups of mini marshmallows with 3 tbsp of butter, then mix in 6 cups of Rice Krispies.
Nutrition
- Serving Size: 1 treat
- Calories: 120
- Sugar: 10g
- Sodium: 50mg
- Fat: 3g
- Saturated Fat: 1g
- Unsaturated Fat: 2g
- Trans Fat: 0g
- Carbohydrates: 22g
- Fiber: 0g
- Protein: 1g
- Cholesterol: 0mg
Keywords: Rice Krispie Treats, American Flag Treats, Patriotic Desserts, Easy Desserts, Summer Recipes