The Joy of Making Instant Pot Yogurt: A Creamy Culinary Adventure
Hey there, fellow food lover! If you’ve ever found yourself overwhelmed by the idea of making yogurt at home, let me assure you, it’s simpler than you think — and the end result is oh-so-rewarding! Today, we’re diving into the world of Instant Pot yogurt-making, where your trusty kitchen gadget transforms a few simple ingredients into a creamy, delicious treat that’s perfect for anytime snacking or breakfast. So, grab your cutting board, and let’s get started on this dairy delight!
A Sweet Trip Down Memory Lane
Growing up, I spent countless afternoons in my grandma’s kitchen. The warm, inviting smell of her homemade yogurt would waft through the air, wrapping me in a nostalgic embrace. She had this magical way of turning a practically simple dish into a centerpiece of our family gatherings. I remember her whisking together milk and a bit of yogurt, sending us off to play as it worked its magic behind closed doors.
Every time we returned, there it was — a big bowl of creamy yogurt, waiting to be adorned with fresh fruits, nuts, and just a drizzle of honey. It felt like a celebration of both our family and the love that went into making it. When I finally got my hands on an Instant Pot, I knew I had to take a stab at recreating that same joy. It reminded me that cooking isn’t just about the food; it’s about the love and memories we create in the kitchen. So, let’s get ready to craft your own yogurt adventure!
Ingredients You’ll Need
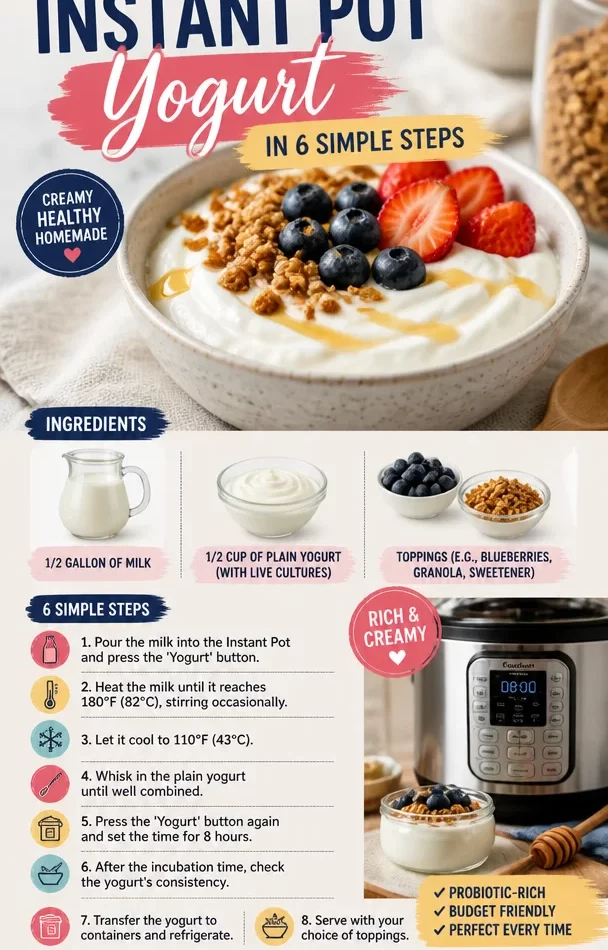
To create delicious, creamy Instant Pot yogurt, you’ll be using just a few simple ingredients. Here’s your shopping list:
-
1/2 gallon of milk
Whether you use whole, 2%, or non-fat, this is the star of the show! Whole milk will give you the creamiest texture, while 2% is a great option if you’re looking for a lighter version. Chef Tip: If you want to elevate the creaminess even further, consider adding a splash of heavy cream! -
1/2 cup of plain yogurt (with live cultures)
This is your yogurt starter. Make sure it says "live cultures" on the label, as these are the good bacteria that will ferment your milk and turn it into yogurt. Substitution Tip: If you can’t find plain yogurt, you can use a flavored yogurt as a starter, but keep in mind it will flavor your yogurt as well. -
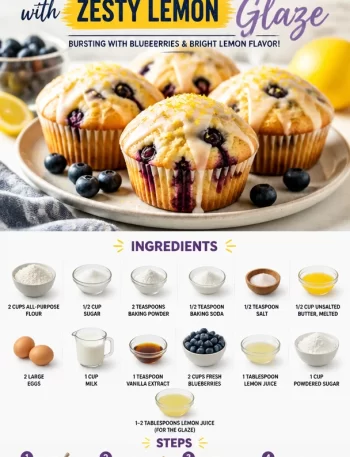
Toppings (e.g., blueberries, granola, sweetener)
This is where you can get creative! Think of the toppings as your yogurt’s finishing touch. Fresh fruit, a sprinkle of granola, or a drizzle of honey can all take your homemade yogurt to the next level. Chef Insight: The sky’s the limit! Try adding chia seeds, nut butter, or chocolate chips for a fun twist!
Step-by-Step Instructions
Ready to turn your ingredients into a creamy delight? Let’s break it down step by step!
Step 1: Sanitize Your Equipment
Before we kick things off, make sure you sanitize your Instant Pot and any utensils you’ll be using. A quick wash with hot soapy water will do the trick. This helps prevent any unwanted bacteria from spoiling your yogurt-making adventure!
Step 2: Heat the Milk
Pour your milk into the Instant Pot and seal the lid. Select the "Yogurt" setting, then hit "Adjust" until it reads "Boil." This step is crucial as it helps pasteurize the milk, ensuring it’s safe for yogurt making. Keep an eye on it — it’ll take about 30 minutes to reach the desired temperature. Chef Tip: If you want to speed things up, you can use the "Sauté" function instead, but be cautious not to scorch the milk!
Step 3: Cool the Milk
Once your milk has boiled, the Instant Pot will beep. Remove the lid and let the milk cool to about 110°F (43°C). You can use a food thermometer for accuracy, or press your pinky into the milk — it should feel warm but not hot. Little Hack: To cool it quicker, you can place the pot inside a bath of cold water, but be sure not to get any water in the milk!
Step 4: Mix in the Yogurt
Scoop out about a cup of the warm milk into a small bowl. Whisk in your 1/2 cup of plain yogurt until it’s nice and smooth. This helps incorporate the starter into the milk evenly. Now, return this mixture back into the Instant Pot with the remaining milk. Helpful Insight: Make sure to stir gently; we don’t want to introduce too many bubbles into our yogurt!
Step 5: Set the Yogurt Cycle
Seal the lid again, select the "Yogurt" function, and set the timer for 8 hours. The longer you leave it, the tangier it will get! If you love a tart yogurt, feel free to extend the time. Chef Tip: Use the "Adjust" button to set it to your preferred fermentation time.
Step 6: Chill Out
Once your yogurt cycle is complete, carefully remove the lid, and you’ll be greeted by the delightful smell of freshly cultured yogurt! At this point, you can give it a gentle stir. Transfer to clean containers and let them chill in the fridge for at least 4 hours to set. This cooling helps it firm up and develop the final texture.
Serving Suggestions
Now that your yogurt is ready, it’s time to plate it up! Scoop generous dollops of homemade yogurt into bowls, and let your creativity soar with toppings. Drizzle honey or maple syrup, sprinkle granola, toss in a handful of fresh berries, and maybe even a dollop of nut butter. Arrange them beautifully for a stunning presentation that will have everyone reaching for a spoon!
Recipe Variations
Here’s where the fun really starts! Try out these creative twists on the classic yogurt recipe:
- Greek Yogurt: For thick Greek-style yogurt, strain the yogurt through cheesecloth after it’s set for extra creaminess.
- Fruit-Infused Yogurt: Mix in pureed fruits like strawberries or mangoes before chilling for a tasty twist!
- Nutty Yogurt: Stir in a couple of tablespoons of your favorite nut butter for added flavor and protein.
- Sweetened Yogurt: If you have a sweet tooth, add flavored syrup like vanilla or almond before fermenting for a luxurious flavor.
- Dairy-Free Option: Substitute cow’s milk with almond milk or coconut milk for a delicious dairy-free yogurt; just use a thicker version for the best texture.
Chef’s Notes
Over the years, I’ve discovered that yogurt-making is really about experimenting and finding the right rhythm that works for you. My early attempts were a bit hit-or-miss, with occasional batches turning out too runny or too tangy. But each go round has really brought me so much joy and expertise! Don’t get discouraged if it doesn’t turn out perfectly the first time — it’s all part of the learning process.
And you know what? Each yogurt batch tells a story — whether it’s the time I threw in some spices for a chai-flavored yogurt or my neighbor’s kids who always ask for the chocolate version. The kitchen is where memories are made, and I can’t wait to see what yours will become!
FAQs and Troubleshooting
1. My yogurt isn’t thickening. What did I do wrong?
This might happen if the milk didn’t reach the right temperature or if the yogurt culture wasn’t active enough. Ensure your starter yogurt has live cultures, and try to monitor the temperature closely during cooking.
2. Why does my yogurt taste tangy?
Tanginess is a natural part of fermentation! If you find it too tangy, try reducing the fermentation time to 6-8 hours instead of the full 12.
3. My yogurt looks curdled. Is it spoiled?
Not necessarily! Sometimes, a little separation is normal, especially if it was stirred too vigorously. Give it a good whisk before serving, and it should combine nicely.
4. Can I use dairy alternatives?
Absolutely! Almond or coconut milk can be utilized — just be sure to use a version that’s thicker and check that they contain thickeners or stabilizers.
Nutritional Info
Per cup of homemade yogurt:
- Calories: ~150
- Protein: ~8g
- Fat: ~8g (varies by the type of milk used)
- Carbohydrates: ~12g
With the ease of making your own yogurt at home, not only can you control ingredients and flavor, but you’ll also feel empowered in the kitchen! So, grab those ingredients and let’s get started. Your creamy, dreamy yogurt adventure awaits! Happy cooking, and remember — every spoonful is an invitation to gather and create wonderful memories together!
PrintInstant Pot Yogurt

Easily make creamy, delicious yogurt at home using your Instant Pot with just a few simple ingredients.
- Prep Time: 15 minutes
- Cook Time: 480 minutes
- Total Time: 495 minutes
- Yield: 4 servings 1x
- Category: Snack
- Method: Instant Pot
- Cuisine: American
- Diet: Vegetarian
Ingredients
- 1/2 gallon of milk
- 1/2 cup of plain yogurt (with live cultures)
- Toppings (e.g., blueberries, granola, sweetener)
Instructions
- Sanitize your equipment. Make sure you sanitize your Instant Pot and any utensils you’ll be using.
- Pour your milk into the Instant Pot and seal the lid. Select the ‘Yogurt’ setting, then hit ‘Adjust’ until it reads ‘Boil.’
- Once your milk has boiled, the Instant Pot will beep. Remove the lid and let the milk cool to about 110°F (43°C).
- Scoop out about a cup of the warm milk into a small bowl. Whisk in your 1/2 cup of plain yogurt until it’s nice and smooth.
- Seal the lid again, select the ‘Yogurt’ function, and set the timer for 8 hours.
- Once your yogurt cycle is complete, carefully remove the lid, and transfer to clean containers and let them chill in the fridge for at least 4 hours to set.
Notes
Experiment with flavors by adding different toppings or infusions, such as fruits or nut butter.
Nutrition
- Serving Size: 1 cup
- Calories: 150
- Sugar: 7g
- Sodium: 100mg
- Fat: 8g
- Saturated Fat: 5g
- Unsaturated Fat: 3g
- Trans Fat: 0g
- Carbohydrates: 12g
- Fiber: 0g
- Protein: 8g
- Cholesterol: 30mg
Keywords: yogurt, instant pot, homemade yogurt, dairy, snacks