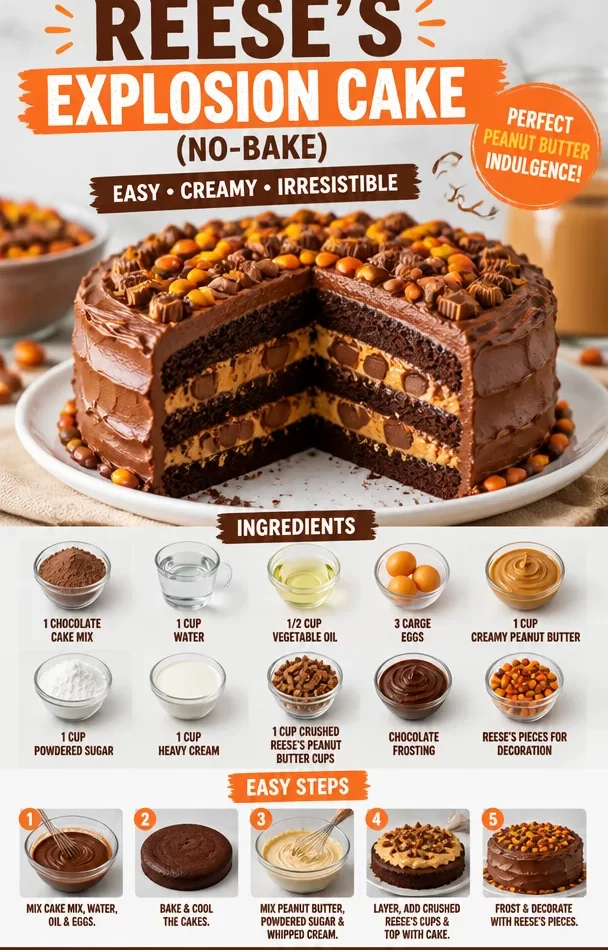
Reese’s Explosion Cake: The Ultimate Sweet Treat
Hey there, fellow food lovers! Today, I’m super excited to share an indulgent dessert that’s sure to rock your taste buds and make any gathering feel festive. We’re diving headfirst into the world of chocolate and peanut butter with my Reese’s Explosion Cake. Trust me, this cake will be the star of your dessert table, and it’s so fun to make! So, grab your apron and let’s get baking together!
A Sweet Memory
Growing up, my family had a special tradition: every birthday celebration would include a unique cake that represented the birthday person’s favorite flavors. One year, my younger cousin was completely obsessed with peanut butter and chocolate—he could devour a whole jar of peanut butter in a day! So, I decided to whip up a cake that would match his love for these two amazing flavors.
I remember standing in the kitchen, chocolate cake mix in one hand and a jar of creamy peanut butter in the other. The smell of the baking cake wafting through the house was so mouthwatering that even my grandma’s famous apple pie looked a bit jealous. When I revealed the cake, adorned with Reese’s Pieces and chocolate frosting, his eyes lit up brighter than a birthday candle. That moment of pure joy is what inspired me to create the Reese’s Explosion Cake recipe we’re diving into today!
Ingredients
Here’s what you’ll need to create this decadent masterpiece:
-
1 chocolate cake mix: Use your favorite brand or homemade, but a rich chocolate mix sets the foundation perfectly.
-
1 cup water: A must for making the cake mix come together, but feel free to substitute it with milk for more richness.
-
1/2 cup vegetable oil: This adds moisture and keeps the cake tender. You can swap it for melted coconut oil if you want a subtle tropical flavor.
-
3 large eggs: Eggs bring richness and help with the cake’s structure. You can use flax eggs (1 tbsp flaxseed meal + 2.5 tbsp water per egg) if you’re plant-based.
-
1 cup creamy peanut butter: The star of the show! Choose the creamy version for smooth spreading. If you’re going for a little crunch, opt for chunky peanut butter.
-
1 cup powdered sugar: For sweetness and to help create that dreamy peanut butter frosting. You can use coconut sugar for a less processed option.
-
1 cup heavy cream: Whipped to soft peaks, it lightens up the frosting. If you’re after a dairy-free variation, use coconut cream!
-
1 cup crushed Reese’s peanut butter cups: For that undeniable Reese’s flavor. If you can’t find them, you can use chopped chocolate-covered peanuts as a substitute.
-
Chocolate frosting: You can use store-bought or homemade—but who doesn’t love a good homemade frosting?
-
Reese’s Pieces for decoration: These colorful chocolates not only add a pop of color but a satisfying crunch too!
Step-by-Step Instructions
Alright, let’s turn those ingredients into a dreamy Reese’s Explosion Cake! Follow these steps and add a sprinkle of joy along the way:
-
Preheat Your Oven: Preheat your oven to 350°F (175°C). Getting the oven nice and hot ensures the cake rises beautifully, so don’t skip this step!
-
Mix the Cake Batter: In a large mixing bowl, combine the chocolate cake mix, 1 cup of water, ½ cup of vegetable oil, and 3 large eggs. Whisk everything together until it’s smooth and well combined. Be sure to scrape the bottom of the bowl with a spatula to incorporate all the dry mix. Pro tip: Avoid overmixing; gentle folds are all you need!
-
Bake the Cake: Divide the batter evenly between two greased 9-inch round cake pans. This ensures even baking. Bake for 28-30 minutes or until a toothpick inserted in the center comes out clean. The sweet smell of chocolate will fill your kitchen—trust me, you’re going to love it!
-
Let It Cool: Once baked, allow the cakes to cool in the pans for about 15 minutes before transferring them to a wire rack. This step is crucial to prevent the cakes from breaking.
-
Prepare the Peanut Butter Frosting: In a mixing bowl, beat together 1 cup of creamy peanut butter and 1 cup of powdered sugar until well combined. Gradually add in 1 cup of heavy cream, mixing until fluffy and smooth. This frosting is rich and has a delightful peanut buttery punch!
-
Layer the Cakes: Once the cakes are completely cooled, place one cake layer on a serving platter. Spread a generous layer of peanut butter frosting on top, then sprinkle with crushed Reese’s peanut butter cups—because why not go big?
-
Add the Second Layer: Place the second cake layer on top of the frosting and gently press down. Now, cover the entire cake with more peanut butter frosting. This is where you can really let your creativity shine!
-
Decorate: Finish it off with chocolate frosting (you can pipe it or spread it) and top with Reese’s Pieces for that extra pizzazz. Make sure to have some of those glorious crushed peanut butter cups sprinkled around the sides for a tasty touch.
Serving Suggestions
When it’s time to serve, cut generous slices and plate them with a swoosh of extra chocolate frosting on the side for those who want even more chocolatey goodness! It’s perfect alongside a scoop of vanilla ice cream—trust me, it’s a match made in dessert heaven. For that extra touch, consider serving with a side of fresh berries for a splash of color!
Recipe Variations
Now that you have the base recipe down, let’s get creative! Here are some fun twists you can try:
-
Nutty Chocolate Variation: Add chopped nuts to the frosting for a crunchy texture contrast or use hazelnuts for a Nutella-inspired twist!
-
Salted Caramel Delight: Drizzle salted caramel sauce on the frosting layers before stacking the cakes for a sweet and salty combo.
-
Dairy-Free Option: Swap out heavy cream for coconut cream and use dairy-free chocolate frosting for a delicious plant-based dessert.
-
Different Cake Flavors: Try using a vanilla or red velvet cake mix for a colorful spin on this recipe while still retaining that peanut buttery goodness!
-
Mini Explosion Cakes: Make individual mini cakes in muffin tins or small mason jars for fun, portioned desserts that are perfect for parties!
Chef’s Notes
This Reese’s Explosion Cake is really one of those recipes that just gets better with a little love and personalization. I’ve played around with different ingredients over the years, and one of my funniest kitchen stories happened when I accidentally used crunchy peanut butter instead of creamy! It turned out to be the hit of the party. Sometimes, even mistakes can become delightful surprises!
And remember, baking is an art, but it’s also a science. Don’t be afraid to experiment with different flavors and textures. That’s how culinary magic happens!
FAQs and Troubleshooting
1. What if my cake doesn’t rise?
Make sure your baking powder is fresh! If it’s outdated, that could lead to a flat cake. Also, avoid overmixing the batter!
2. My frosting is too runny. What can I do?
If your peanut butter frosting is too runny, try refrigerating it for a bit to firm up. You can also add more powdered sugar gradually until it reaches your desired consistency.
3. Can I store leftovers?
Absolutely! Keep any leftover cake covered in the fridge for up to 3-4 days. Just know that the Peanut Butter frosting will get a little firmer and less creamy over time, but it’ll still be delicious!
4. Can I freeze the cake?
Yes! You can freeze the layers before frosting for up to 3 months. Just wrap them well in plastic wrap. When you’re ready to eat, let them thaw in the fridge overnight before frosting and serving.
Nutritional Info (optional)
For those keeping track, each slice of the Reese’s Explosion Cake (1/12th of the cake) typically contains approximately 450 calories, with 20g of fat and 50g of sugar. Indulgent? Yes, but it’s birthday cake! Enjoy it mindfully!
So there you have it! The ultimate guide to creating a Reese’s Explosion Cake that will steal the spotlight at any gathering. Whether for a birthday, a special occasion, or just because you deserve a treat, this cake will not disappoint. Happy baking, and remember, cooking should always be fun, delicious, and filled with love! Let’s reach the peak together, one slice at a time!
PrintReese’s Explosion Cake
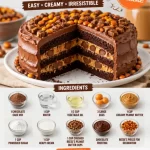
An indulgent dessert combining rich chocolate cake and creamy peanut butter frosting, topped with Reese’s Pieces for a festive touch.
- Prep Time: 15 minutes
- Cook Time: 30 minutes
- Total Time: 45 minutes
- Yield: 12 servings 1x
- Category: Dessert
- Method: Baking
- Cuisine: American
- Diet: Vegetarian
Ingredients
- 1 chocolate cake mix
- 1 cup water
- 1/2 cup vegetable oil
- 3 large eggs
- 1 cup creamy peanut butter
- 1 cup powdered sugar
- 1 cup heavy cream
- 1 cup crushed Reese’s peanut butter cups
- Chocolate frosting
- Reese’s Pieces for decoration
Instructions
- Preheat your oven to 350°F (175°C).
- Mix the chocolate cake mix, 1 cup of water, ½ cup of vegetable oil, and 3 large eggs in a bowl until smooth.
- Bake the batter in two greased 9-inch round cake pans for 28-30 minutes.
- Let the cakes cool in the pans for about 15 minutes.
- Prepare the peanut butter frosting by blending 1 cup of peanut butter with 1 cup of powdered sugar, then adding 1 cup of heavy cream.
- Layer one cake layer on a platter, frosting it and adding crushed Reese’s peanut butter cups.
- Add the second cake layer on top, cover with more peanut butter frosting.
- Decorate with chocolate frosting and top with Reese’s Pieces.
Notes
Perfect for birthday celebrations or special occasions. Consider serving with vanilla ice cream for an extra treat.
Nutrition
- Serving Size: 1 slice
- Calories: 450
- Sugar: 50g
- Sodium: 400mg
- Fat: 20g
- Saturated Fat: 8g
- Unsaturated Fat: 10g
- Trans Fat: 0g
- Carbohydrates: 60g
- Fiber: 2g
- Protein: 6g
- Cholesterol: 50mg
Keywords: cake, dessert, chocolate, peanut butter