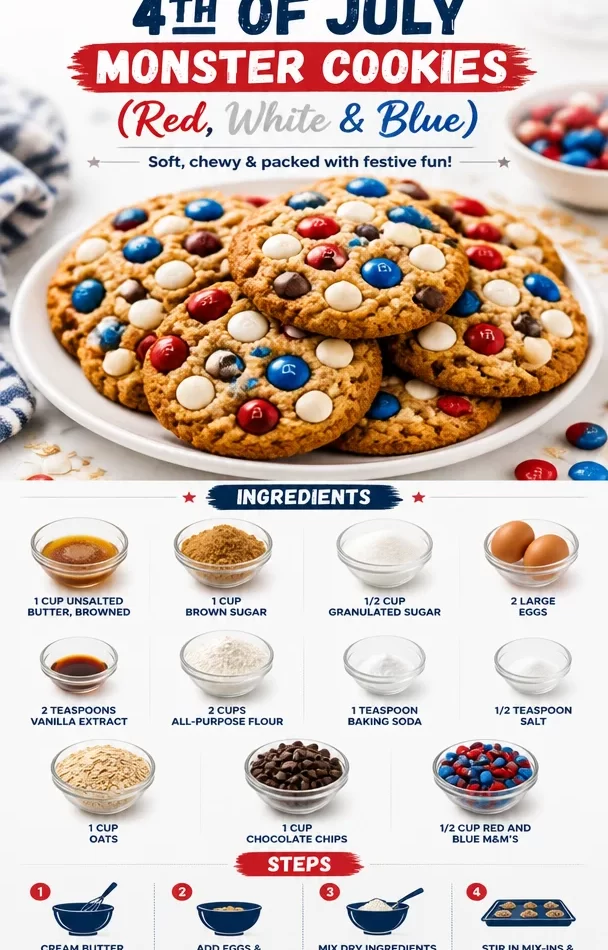
Celebrating the 4th of July with Monster Cookies
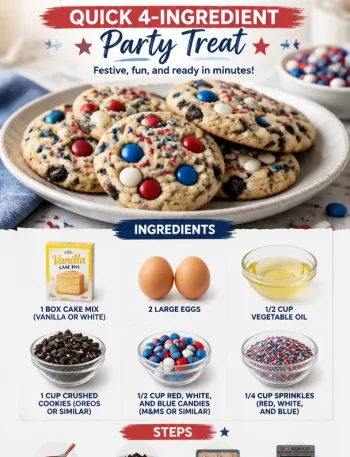
Hey there, fellow foodies! If you’re like me, the 4th of July isn’t just a day for fireworks and barbecues; it’s a celebration of friends, family, and most importantly, fantastic food. And what better way to sweeten your Independence Day than with a batch of colorful, chewy Monster Cookies that pack a punch of flavor and nostalgia?
These cookies are the ultimate combination of crunchy, soft, and fudgy goodness, adorned with festive red and blue M&M’s that give them a patriotic flair. So grab your apron, fire up that mixer, and let’s whip up a batch of these cheerful treats that will have everyone reaching for seconds (or thirds!).
A Walk Down Memory Lane
As a kid, the 4th of July meant more than just fireworks. It was a cherished family tradition to spend the day at my grandmother’s house, where laughter danced in the air, and the smell of freshly baked cookies wafted through the kitchen. I remember her famous cookie jar perched on the counter, the lid slightly askew as if it couldn’t bear to contain the delicious treats inside.
One summer, after collecting what felt like a mountain of firecrackers and sparklers, I dashed inside to find my grandmother bustling around, prepping a batch of cookies. I impatiently asked if I could help, and she handed me a wooden spoon, letting me mix the vibrant candies into the dough. With every scoop, her warm smile lit up the room, and as we waited for the cookies to bake, we chatted about our plans to watch the fireworks later that night.
Now, every time I bake Monster Cookies, I think back to that summer filled with sweet memories, and I hope to recreate that joy by sharing the experience with all of you. Let’s keep traditions alive—one cookie at a time!
Ingredients You’ll Need
Here’s what you’ll need to create this festive 4th of July treat:
-
1 cup unsalted butter, browned
Browning the butter adds a delightful depth of flavor, giving your cookies a nutty aroma. If you’re in a pinch, you can substitute it with margarine, but I highly recommend sticking with butter for the best taste. -
1 cup brown sugar
This lends sweetness and a chewy texture. If you want to lighten the cookies slightly, you could replace half with coconut sugar. -
1/2 cup granulated sugar
This balances the caramel-like flavor of the brown sugar. Feel free to use a sugar substitute like Stevia if you’re watching sugar intake. -
2 large eggs
Eggs help bind the ingredients together and provide richness. For a vegan alternative, use flax eggs (1 tablespoon ground flaxseed + 2.5 tablespoons water = 1 egg, let sit for 5 min). -
2 teaspoons vanilla extract
Pure vanilla extract gives depth. If you’re feeling adventurous, try using almond extract for a different flavor twist! -
2 cups all-purpose flour
This is the backbone of your cookie. For a gluten-free option, use a 1:1 gluten-free flour blend. -
1 teaspoon baking soda
Baking soda is your leavening agent, providing a lift. Ensure it’s within date for optimal effectiveness! -
1/2 teaspoon salt
Salt enhances the sweetness and balances flavors. You can experiment with sea salt for a gourmet touch. -
1 cup oats
Old-fashioned oats add texture and chewiness. If you’re in a hurry, quick oats are a suitable substitute. -
1 cup chocolate chips
Choose your favorite! Dark, semi-sweet, or even white chocolate—whatever makes your heart sing. -
1/2 cup red and blue M&M’s
These add the festive touch! You can swap them out for seasonal candies or chocolate pieces according to your celebrations.
Step-by-Step Instructions
Now that we have our ingredients lined up, let’s dive into the baking process! Grab your mixing bowls because things are about to get delicious.
-
Preheat your oven:
Start by preheating your oven to 350°F (175°C). This is key for ensuring your cookies bake perfectly. While the oven heats up, it gives you time to prepare your cookie sheet! -
Brown the butter:
In a medium saucepan, melt the unsalted butter over medium heat. Keep stirring until it turns golden brown and gives off a nutty aroma (about 5-7 minutes). Stay close, as it can go from perfectly brown to burnt quickly! Let it cool slightly. -
Mix the sugars:
In a large bowl, combine the brown sugar and granulated sugar. Pour in your cooled, browned butter and mix until well blended. This is where the magic begins! -
Add in the eggs and vanilla:
Crack in the eggs and pour in the vanilla extract, mixing until everything is fluffy and combined. It’ll smell so delightful at this stage! -
Sift the dry ingredients:
In a separate bowl, whisk together the flour, baking soda, and salt. Sifting helps eliminate lumps and ensures a smoother cookie texture. Gradually add the dry ingredients to the butter and sugar mixture, stirring until just combined. -
Fold in oats and chocolate chips:
The texture is key! Gently fold in oats, chocolate chips, and red and blue M&M’s until evenly distributed. It’ll look colorful and scrumptious! -
Scoop onto baking sheets:
Use a cookie scoop or tablespoon to drop dough onto a lined baking sheet, keeping some space between each cookie for spreading. I like to press a few extra M&M’s on top for that beautiful finish. -
Bake:
Pop your cookies into the preheated oven for 10-12 minutes, or until the edges are golden brown but the centers are still chewy. Trust me, it’ll be hard to resist the aroma wafting through your kitchen! -
Cool before devouring:
Once done, remove them from the oven and let them cool on the baking sheet for about 5 minutes before transferring to a wire rack. Then, the hard part: waiting until they cool completely!
Serving Suggestions
These colorful Monster Cookies are not only a treat for the taste buds, but they’re also a feast for the eyes. When serving, stack them high on a fun platter and let the red, blue, and chocolate hues pop! You can also pair them with a glass of cold milk or a scoop of vanilla ice cream to take your dessert to the next level. Just imagine the smiles as friends and family gather around to indulge in these festive bites!
Fun Recipe Variations
Want to switch things up? Here are a few creative twists to make your Monster Cookies even more exciting:
- Nutty Delight: Add chopped nuts like pecans or walnuts for a satisfying crunch.
- Peanut Butter Monster Cookies: Substitute half of the butter with creamy peanut butter for an extra layer of flavor.
- Dried Fruits: Incorporate dried cherries or cranberries for a pop of tartness and chew.
- Spicy Kick: Add a sprinkle of cinnamon or a pinch of cayenne pepper for a unique flavor experience.
- Seasonal Swaps: Customize with seasonal candies, like candy corn in the fall or pastel M&M’s in spring!
Chef’s Notes
Over the years, I’ve learned a few tricks to perfect these cookies. Initially, I would try to rush the process, skipping the browning step. Let me tell you, that’s a cardinal sin! The depth of flavor that browning brings is unbeatable. And of course, I can’t resist the joy of experimenting—every time I bake, I try new additions or swaps, and they often lead to delightful surprises. Whether you’re baking for a holiday or a random Tuesday, these cookies bring that touch of magic to any occasion.
FAQs and Troubleshooting
1. Why are my cookies flat?
Flat cookies could be due to a few things. Ensure your butter is not melted before adding to the mixture—you want it to be browned but still solid. Also, check the freshness of your baking soda!
2. Can I freeze Monster Cookies?
Absolutely! Dough can be frozen for up to three months. Just scoop the dough onto a tray, freeze until solid, then transfer to a bag. When you’re ready to bake, no need to thaw—just add a couple of minutes to the baking time!
3. How do I know when my cookies are done?
Look for golden edges with a soft center. They will continue to cook slightly after being removed from the oven, so it’s best to under-bake them a bit for that chewy texture.
4. What’s the best way to store these cookies?
Store in an airtight container at room temperature for up to a week! For longer freshness, keep them in the fridge or freeze them.
Nutritional Information
Optional section, not included as per your request.
There you have it! With colorful flair, delicious flavor, and a sprinkle of nostalgia, these 4th of July Monster Cookies are sure to be a showstopper at your celebrations. I can’t wait for you to make these and share them at your gatherings! Let’s keep the kitchen buzzing and make this Independence Day one to remember, one cookie at a time!
PrintMonster Cookies for the 4th of July
Celebrate Independence Day with colorful and chewy Monster Cookies that are packed with flavor and nostalgia.
- Prep Time: 15 minutes
- Cook Time: 12 minutes
- Total Time: 27 minutes
- Yield: 24 servings 1x
- Category: Dessert
- Method: Baking
- Cuisine: American
- Diet: Vegetarian
Ingredients
- 1 cup unsalted butter, browned
- 1 cup brown sugar
- 1/2 cup granulated sugar
- 2 large eggs
- 2 teaspoons vanilla extract
- 2 cups all-purpose flour
- 1 teaspoon baking soda
- 1/2 teaspoon salt
- 1 cup oats
- 1 cup chocolate chips
- 1/2 cup red and blue M&M’s
Instructions
- Preheat your oven to 350°F (175°C).
- Brown the butter in a medium saucepan over medium heat for about 5-7 minutes until golden and nutty.
- Mix the brown sugar and granulated sugar in a large bowl, then pour in the cooled butter and blend.
- Add the eggs and vanilla extract, mixing until fluffy.
- Sift together the flour, baking soda, and salt in a separate bowl, then gradually mix into the wet mixture.
- Fold in oats, chocolate chips, and M&M’s until evenly distributed.
- Scoop dough onto lined baking sheets with space in between each cookie.
- Bake for 10-12 minutes or until edges are golden.
- Cool on the baking sheet for 5 minutes, then transfer to a wire rack.
Notes
For a nutty twist, add chopped nuts; for extra flavor, substitute half the butter with peanut butter.
Nutrition
- Serving Size: 1 cookie
- Calories: 200
- Sugar: 15g
- Sodium: 150mg
- Fat: 10g
- Saturated Fat: 6g
- Unsaturated Fat: 4g
- Trans Fat: 0g
- Carbohydrates: 25g
- Fiber: 1g
- Protein: 2g
- Cholesterol: 30mg
Keywords: Monster Cookies, 4th of July, Desserts, Cookies, Patriotic Treats