Indulging in Sweet Nostalgia: The Ultimate Oreo Dessert
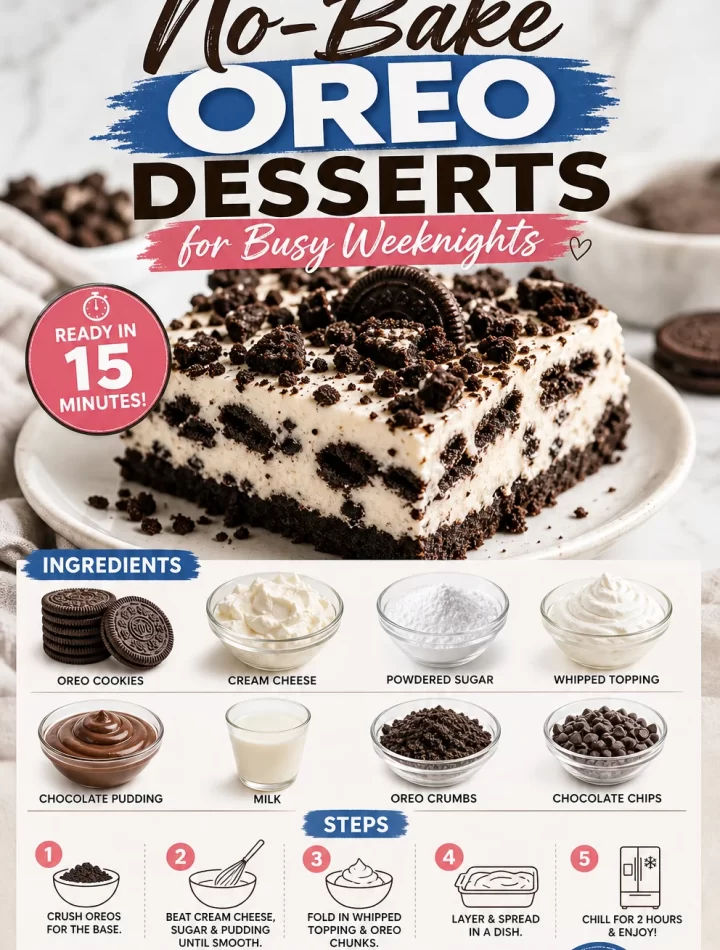
Hey there, fellow food lover! Today, we’re diving into a scrumptious recipe that will not only tickle your taste buds but also take you on a delicious trip down memory lane. The star of our show? Oreo desserts! There’s something undeniably magical about those iconic chocolate wafers and that creamy filling that brings smiles and memories to the table. Plus, I’m all about simple yet elevated cooking, and trust me, this dessert hits all the right notes!
A Sweet Memory to Cherish
Allow me to take you back to my childhood, to a cozy afternoon filled with laughter, the smell of chocolate in the air, and, of course, my favorite dessert: an Oreo cake made by my mom. It was one of those special treats that we would save for birthdays and family gatherings. As soon as we entered the kitchen, we were welcomed by the sight of her confidently whipping up that delightful cake, layers of moist chocolate and creamy white frosting sandwiched between crushed Oreos. I can still hear the joyous sounds of my siblings and me begging her for just one more slice. Little did I know then that those sweet moments would inspire my passion for recipe development! Now I proudly share the joy of Oreo desserts in my own kitchen, helping others create those very same joyful memories with family and friends.
Ingredients You’ll Need
Let’s get down to business! To whip up this dreamy Oreo dessert, you’ll need a few simple ingredients that not only bring incredible flavor but are also easy to find. Here’s what you’ll need:
- Oreo Cookies (36 for base and more for topping): The star of any Oreo dessert! If you’re feeling daring, try different flavors like mint or peanut butter Oreos for a fun twist.
- Unsweetened Cocoa Powder (1/2 cup): For that deep chocolate flavor. Substituting with dark cocoa will give you a richer taste if you prefer.
- Granulated Sugar (1 cup): To sweeten the pot! For a healthier twist, you can use coconut sugar or a sugar substitute that measures like sugar.
- All-Purpose Flour (1 cup): This gives structure to your dessert. If you need a gluten-free option, use almond flour or a gluten-free flour blend.
- Baking Powder (1 teaspoon): This little guy helps your dessert rise to perfection. Don’t skip it! Baking soda can also work in a pinch, though you might need a bit of lemon juice for acidity.
- Eggs (2 large): Binding all those flavors together! Flax eggs can be a great substitute for a vegan option.
- Vanilla Extract (1 teaspoon): A drop of this magic elixir elevates your dessert. If you’re out, use almond extract for an interesting flavor profile.
- Butter (1/2 cup, melted): Adds richness and moisture. In a dairy-free recipe, coconut oil can do the trick beautifully.
- Heavy Cream (1 1/2 cups, for the frosting): Creaminess elevated! You can use whipped coconut cream for a lighter, vegan-friendly option.
Step-by-Step Instructions
Ready to get baking? Let’s create this wonderful Oreo dessert step-by-step!
-
Preheat Your Oven: Start by preheating your oven to 350°F (175°C). This ensures your dessert will bake evenly and come out just right!
-
Prepare Your Baking Pan: Grab an 8-inch round cake pan (or two, if you’re making layers!). Grease it lightly with butter or spray it with a non-stick baking spray, and line the bottom with parchment paper for easy removal later. Little tricks like this save you headaches come serving time!
-
Crush the Oreos: In a food processor, pulse about 36 Oreo cookies until they resemble fine crumbs. This will be the base of our dessert! If you don’t have a processor, put them in a zip-top bag and crush them with a rolling pin. Get those arms moving!
-
Mix Dry Ingredients: In a large mixing bowl, combine the crushed Oreos, cocoa powder, flour, sugar, and baking powder. Mix well so all the dry ingredients are incorporated.
-
Combine Wet Ingredients: In another bowl, whisk together the melted butter, eggs, and vanilla extract until smooth. It’s all about balance; you want that rich flavor to shine through.
-
Combine and Mix: Pour the wet ingredients into the dry mixture, and gently fold everything together until just combined. Don’t overmix – you want to maintain that lovely texture.
-
Bake It Up: Pour the batter into your prepared cake pan and smooth the top with a spatula. Pop it into the oven and let it bake for about 25-30 minutes or until a toothpick comes out clean. Make sure to keep an eye on it in the last few minutes; we don’t want burnt edges!
-
Cool Down: Once baked, remove the cake from the oven and let it cool in the pan for about 10 minutes before transferring it to a wire rack to cool completely. Trust me, the aroma alone will drive everyone wild!
-
Prepare the Frosting: While the cake cools, whip up the frosting! In a mixing bowl, beat heavy cream until soft peaks form, then gradually add sugar and mix until you reach stiff peaks. Fold in some crushed Oreos for texture – you can never have too many!
-
Assemble Your Masterpiece: Once the cake is completely cool, place it on a serving plate or a cake stand. Spread a generous layer of your Oreo frosting on top of the first layer, and if you baked two layers, add the second layer and frost the top and sides. Don’t forget to sprinkle additional crushed Oreos on the top for some extra crunch and visual appeal!
Serving Suggestions
Serving this dessert is all about the presentation! Cut the cake into generous slices, and serve it with extra whipped cream or a drizzle of chocolate sauce on the side. You can also garnish with mini Oreos, fresh mint leaves, or chocolate shavings for that restaurant-worthy touch. Don’t forget to serve it on a beautiful platter to set the stage for your gathering. It’s all about making food feel special!
Recipe Variations
The beauty of an Oreo dessert is its versatility! Here are some creative twists you can try for a unique take:
- Minty Fresh: Add a few drops of mint extract to the frosting for a refreshing mint Oreo version.
- Peanut Butter Delight: Substitute half of the heavy cream in your frosting with creamy peanut butter for an indulgent blend.
- Banana Chocolate: Layer slices of fresh banana in between the cake layers for a unique fruit twist.
- Vegan Option: Swap out the eggs with flax eggs and use coconut cream for the frosting for a delightful vegan dessert.
Chef’s Notes
Every recipe tells a story, and this one is no different! As I experimented with this Oreo dessert over the years, I discovered that sometimes less is more. Finding the right balance between rich chocolate, creamy frosting, and that perfect crunch of Oreos was key to ensuring everyone went back for seconds (or thirds!). One of my favorite moments was when my niece, just a tiny tot at the time, asked if we could “dive into a pool of frosting.” I laughed so hard—I knew I had to make this cake a family tradition!
FAQs and Troubleshooting
1. Why did my cake not rise?
If your cake didn’t rise, it might be due to expired baking powder. Always check your ingredients for freshness before baking—we want that fluffiness!
2. How can I prevent my cake from sticking to the pan?
Using parchment paper on the bottom of your cake pans is a great step! Additionally, greasing the sides of the pan ensures a smooth release.
3. Can I make this dessert ahead of time?
Absolutely! You can bake the cake a day in advance and store it tightly wrapped in plastic wrap. Just frost it on the day you plan to serve it for the best taste and texture.
4. What should I do if my frosting is too runny?
If you find your frosting too runny, just toss it back in the mixer and whip it a little longer! If it still doesn’t firm up, add a little more powdered sugar, and that should do the trick.
Nutritional Info
While decadent desserts like this Oreo delight are meant for special occasions, knowing the nutrition can help you plan wisely. A slice (about 1/12 of the cake) contains approximately:
- Calories: 350
- Total Fat: 20g
- Saturated Fat: 10g
- Carbohydrates: 40g
- Protein: 4g
Remember, moderation is key when enjoying desserts!
So there you have it, my wonderful friends—an easy-to-follow recipe for an Oreo dessert that’s as nostalgic as it is delicious. I hope this inspires you to gather your loved ones around the table, share laughter, and create sweet memories just like I did growing up. With a dash of creativity and a pinch of love, you’ll truly cook at your peak! Happy baking!
PrintUltimate Oreo Dessert

A nostalgic and delicious Oreo dessert that combines layers of chocolate cake with creamy frosting, sure to bring back sweet memories.
- Prep Time: 15 minutes
- Cook Time: 30 minutes
- Total Time: 45 minutes
- Yield: 12 servings 1x
- Category: Dessert
- Method: Baking
- Cuisine: American
- Diet: Vegetarian
Ingredients
- 36 Oreo Cookies (for base) + more for topping
- 1/2 cup Unsweetened Cocoa Powder
- 1 cup Granulated Sugar
- 1 cup All-Purpose Flour
- 1 teaspoon Baking Powder
- 2 large Eggs
- 1 teaspoon Vanilla Extract
- 1/2 cup Butter (melted)
- 1 1/2 cups Heavy Cream (for frosting)
Instructions
- Preheat your oven to 350°F (175°C).
- Prepare your baking pan by greasing it and lining with parchment paper.
- Crush the 36 Oreo cookies in a food processor until they resemble fine crumbs.
- Mix the dry ingredients: combine the crushed Oreos, cocoa powder, flour, sugar, and baking powder in a large bowl.
- Combine the wet ingredients by whisking together melted butter, eggs, and vanilla extract.
- Pour the wet mixture into the dry mixture and gently fold until just combined.
- Bake the batter in the prepared pan for 25-30 minutes until a toothpick comes out clean.
- Cool the cake in the pan for 10 minutes, then transfer to a wire rack to cool completely.
- Prepare the frosting by beating heavy cream until soft peaks form, then gradually add sugar and mix until stiff peaks appear.
- Assemble the dessert by layering frosting and additional crushed Oreos on the cooled cake.
Notes
For variations, try using mint or peanut butter Oreos, or making a vegan option with flax eggs and coconut cream.
Nutrition
- Serving Size: 1 slice
- Calories: 350
- Sugar: 20g
- Sodium: 150mg
- Fat: 20g
- Saturated Fat: 10g
- Unsaturated Fat: 10g
- Trans Fat: 0g
- Carbohydrates: 40g
- Fiber: 2g
- Protein: 4g
- Cholesterol: 30mg
Keywords: Oreo cake, dessert, childhood memories, chocolate dessert, easy baking